Transplanting
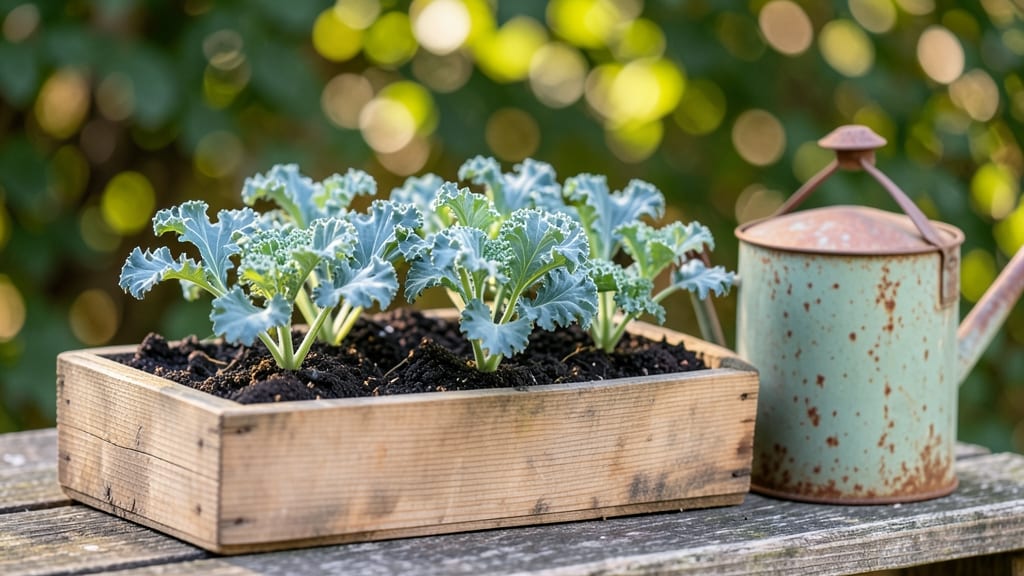
Here are some kale seedlings pictures that’ll make you fall in love with this easy-to-grow green—those first true leaves are pure magic. 🌱 The journey from seed to transplant isn’t just about patience; it’s about knowing what healthy growth looks like at each stage so you can catch problems early.
Most beginners struggle with leggy seedlings or yellowing leaves, but the fix is simple: proper light and spacing make all the difference. A sunny windowsill or grow light keeps them strong, while overcrowding invites pests and disease.
I’ve learned that even a slight bend in the stem signals it’s time to thin or move seedlings.
By the time they’re ready to transplant, your kale should have bold, dark green leaves and a compact root system—no floppy stems or holes from pests. That’s when you know you’ve done it right, and the real harvest is just beginning.
This guide will walk you through each stage with clear visual cues, so you’ll recognize healthy growth the moment it happens. No more guesswork—just confident, thriving seedlings that translate to a bountiful garden.
📚 In This Guide
- What you need
- Instructions
- Tips and common mistakes
- Wrapping up and next steps
What you need
- ● Kale seeds: Choose heirloom or organic varieties like Curly Kale, Lacinato (Dinosaur Kale, or Red Russian. Aim for 1–2 grams (about 200–400 seeds) for a small batch.
- ● Seed-starting trays or pots: Use biodegradable peat or coconut coir pots (3–4 inches deep) or a seedling tray with cells (2–3 inches deep). Ensure they have drainage holes.
- ● Seed-starting mix: A lightweight, sterile potting mix (avoid garden soil). Look for blends labeled for seedlings or seed-starting.
- ● Grow lights or sunny windowsill: A full-spectrum LED grow light (12–16 inches above seedlings) or a south-facing window with 6+ hours of sunlight daily.
- ● Spray bottle: For gentle watering (avoid over-saturating seeds).
- ○ Heat mat (optional but helpful): A seedling heat mat (set to 70–75°F) speeds up germination for slower varieties.
- ● Fine-mist sprayer or watering can: Ensures even moisture without disturbing seeds.
- ● Plastic wrap or humidity dome: Keeps seeds moist during germination (remove once sprouts appear).
- ● Small hand trowel or spoon: For transplanting seedlings later.
- ○ Fertilizer (optional): A balanced, water-soluble fertilizer (5-5-5 or 10-10-10) diluted to half-strength for first feeding.
- ● Labels & markers: To track planting dates and varieties.
How to identify healthy kale seedlings at every growth stage
Watch for these telltale signs—each stage reveals whether your seedlings are thriving or struggling.
🌱 Step 1: Spot Germination and First True Leaves
Germination happens in 5-10 days at 65-75°F, and you'll see tiny green hooks break through the soil. These are the first leaves, but they're not the real deal—don't harvest or thin yet. The moment you spot two round, smooth leaves (called cotyledons), you're past the critical sprout phase.
Here's the thing—if seeds take longer than 14 days to sprout, check moisture. The soil should feel like a damp sponge, not bone-dry or soggy. If you see mold or fuzzy growth on the soil surface, that's damping-off, and you'll need to replant. Healthy seedlings at this stage have bright green cotyledons and no signs of wilting.
🌿 Step 2: Recognize True Leaves and Early Growth
Once the first pair of true leaves appears—these look like miniature kale leaves, not the round cotyledons—you're in the 2-3 week mark. True leaves are a game-changer because they indicate the plant is photosynthesizing properly. At this point, seedlings should be 1-2 inches tall with sturdy stems.
Watch for leggy growth (thin, stretched stems) as a red flag. This means your seedlings aren't getting enough light. If you see this, move them within 2-3 inches of a grow light or brighter window. Strong seedlings have dark green, compact leaves and stems that feel firm to the touch.
💧 Step 3: Assess Transplant-Ready Seedlings
By 4-6 weeks, healthy kale seedlings should have 4-6 true leaves and be 4-6 inches tall. Look for deep green, slightly wrinkled leaves—this texture is normal and indicates good moisture retention. The roots should fill the container, and you might even see them growing through drainage holes.
Don't rush transplanting just because they've hit these measurements. Wait until seedlings have 3-4 sets of true leaves and the stems are ¼-inch thick. You'll know they're ready when they bounce back quickly after a gentle tug—this shows strong root systems. If leaves look pale or yellowing, they need more nitrogen or better drainage.
✂️ Step 4: Monitor Post-Transplant Health
After transplanting, focus on the bottom leaves first. These should stay green and crisp for 10-14 days before any signs of stress appear. If you notice yellowing at the base, it's often due to overwatering or poor drainage. Healthy transplanted seedlings will show new growth within 7-10 days.
Real talk: Kale seedlings can handle a little stress, but they won't tolerate soggy roots. Water when the top inch of soil feels dry, and always water at the base. You'll see the healthiest plants developing tight, upright growth with leaves that curl slightly at the edges—a classic sign of strong, thriving kale.
Tips & tricks for identifying healthy kale seedlings
Don't get caught off guard by subtle signs—these key insights will help you nurture thriving kale seedlings every time.
Lighting is Everything: In Step 2, when you're checking for true leaves, pay close attention to the light source. Kale seedlings need 12-16 hours of light daily—if your seedlings are stretching toward the light with thin stems, they're begging for more brightness. I've seen seedlings go from leggy to sturdy within days just by moving them to a south-facing window or under a grow light. The golden rule: if you can see shadows under the leaves, the light's too weak.
Moisture Matters at Every Stage: While the instructions mention checking moisture after 14 days, I've learned the hard way that consistent moisture is critical from day one. Use your finger to check soil moisture—it should feel like a damp sponge, not dry or soggy. In Step 1, if you see mold or fuzzy growth, that's damping-off, and you'll need to replant immediately. For best results, water at the base in the morning so leaves have time to dry before evening.
Root Health Check: In Step 3, when assessing transplant-ready seedlings, gently squeeze the base of the stem. Healthy roots will make the stem feel firm and resilient—almost like a tiny tree branch. If it feels mushy, the roots are waterlogged. You can also check for root growth by looking through the drainage holes. Strong roots are your best indicator that these seedlings are ready to handle outdoor conditions.
Transplant Timing Secret: The instructions mention waiting for 3-4 sets of true leaves, but here's what nobody tells you—transplant on a cloudy day or in the late afternoon. Kale seedlings are sensitive to transplant shock, and cooler temperatures help them recover faster. I've found that seedlings transplanted this way show new growth within 7-10 days, while those moved on sunny afternoons often struggle for weeks.
Pro Tips for Kale Seedlings Pictures
- Don't get caught off guard by subtle signs—these key insights will help you nurture thriving kale seedlings every time.
- Lighting is Everything: In Step 2, when you're checking for true leaves, pay close attention to the light source. Kal...
- Moisture Matters at Every Stage: While the instructions mention checking moisture after 14 days, I've learned the har...
Frequently asked questions
Got questions about nurturing your kale seedlings? You’re not alone! Here are answers to the most common queries—from timing to troubleshooting—to help you grow thriving plants with confidence.
How long does it take for kale seedlings to be ready for transplanting?
Kale seedlings typically take 4-6 weeks from sprouting to reach transplant readiness. Look for 3-4 true leaves (not the initial seed leaves) and sturdy stems—this signals they’re strong enough to handle outdoor conditions. Pro tip: Harden them off for 7-10 days before moving them to the garden to avoid shock!
Why are my kale seedlings turning yellow or purple?
Yellowing leaves often mean overwatering or poor drainage, while purple hues indicate nutrient deficiencies (like nitrogen or phosphorus). Check soil moisture and ensure pots have drainage holes. For purple seedlings, add a balanced fertilizer or compost to boost nutrients. Quick fix: Reduce watering slightly and test soil pH (ideal: 6.0-7.0).
Can I eat kale seedlings if they’re small?
Young kale seedlings (even just a few inches tall) are edible and packed with nutrients. Harvest the tender leaves for salads or stir-fries. Just avoid the tough stems if they’re woody. Bonus: Microgreens (harvested at 1-2 inches) are a flavorful, nutrient-dense snack!
What’s the best alternative if my kale seedlings fail to germinate?
If germination stalls, try soaking seeds overnight in warm water or switching to pre-started seedlings from a nursery. Other cold-hardy greens like spinach, arugula, or Swiss chard are great backups—they thrive in similar conditions. Remember: Kale seeds need consistent moisture and warmth (60-70°F) to sprout.
How do I fix leggy or weak kale seedlings?
Leggy seedlings usually result from lack of light. Move them to a sunny windowsill or under grow lights (12-16 hours/day). If already stretched, bury the stems deeper when transplanting to encourage root growth. Thin crowded seedlings to 2-3 inches apart to reduce competition. Preventative tip: Use reflective surfaces to maximize light!
Wrapping up and next steps
Growing kale seedlings from sprout to transplant is a rewarding journey filled with vibrant green progress!
By recognizing each stage—from tiny sprouts to sturdy seedlings—you’ll ensure healthy, thriving plants ready for your garden. Don’t let setbacks discourage you: even the most seasoned gardeners face challenges, but your efforts will soon pay off with a bountiful harvest. 🌱
Now that you’re equipped with kale seedlings pictures and expert tips, take the next step: transplant your seedlings outdoors when they’re 4-6 inches tall and hardy enough to handle cooler temperatures. Happy planting—your future salads are waiting! 🥬✨