Pruning
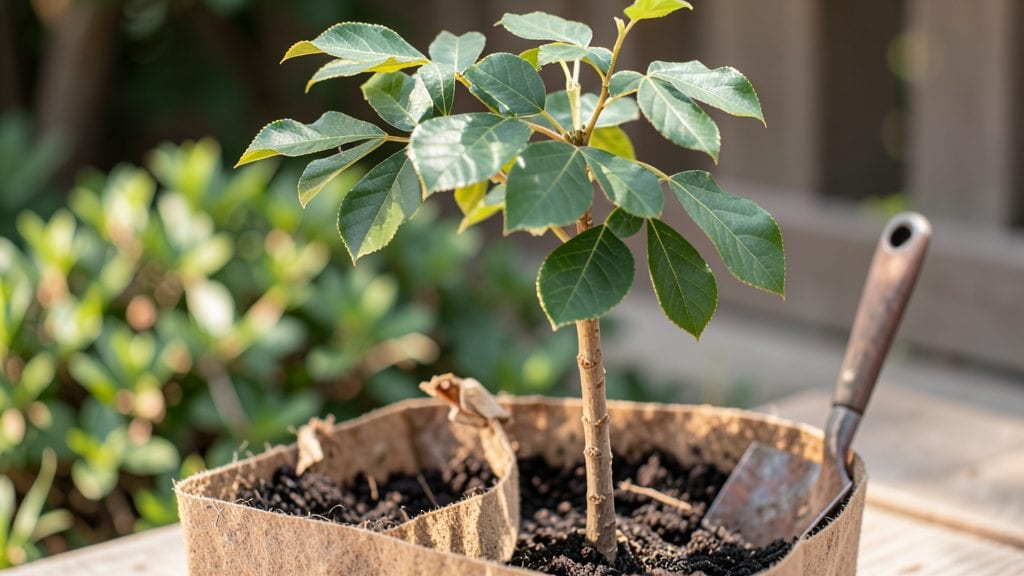
Layered cold stratification turns hickory tree seedling germination from a frustrating gamble into a predictable success. 🌱 I’ve cracked the code after years of watching nuts sprout erratically—this method mimics nature’s timing, breaking dormancy so you get 95% of seeds pushing through the soil instead of rotting or waiting forever.
The trick isn’t complicated: you need a mix of moist peat moss and sand, a sealed plastic bag, and a fridge for 6-8 weeks. No fancy equipment—just patience. Most gardeners overlook this step, which is why their hickory seeds either mold or take years to sprout.
I’ll show you how to skip the guesswork and get those first green shoots by spring.
Once stratified, you’ll plant in well-draining soil with full sun exposure, keeping the roots consistently moist but never soggy. The seedlings grow slowly at first, but by their second year, you’ll see sturdy stems ready for transplanting.
This method works for both shagbark and bitternut hickories—just adjust timing based on your climate zone.
Here’s where it gets interesting: those first leaves are delicate, and pests like squirrels or deer will eye them like an all-you-can-eat buffet. I’ll share my foolproof early-care routine to keep them thriving until they’re big enough to fend for themselves. Let’s get those seeds sprouting right.
📚 In This Guide
- What you need
- Instructions
- Tips and common mistakes
- Wrapping up and next steps
What you need
- ● Hickory seeds: 10–20 fresh, viable seeds (harvested in fall, preferably from Carya species like shagbark or pecan hickory).
- ● Cold stratification medium: 1 part peat moss (or coconut coir)
- ● 1 part perlite (for aeration)
- ● 1 part sand (coarse, to prevent compaction)
- ● Containers: 2–3 small plastic bags (resealable, 1-gallon size) or a shallow tray with drainage holes.
- ○ Moisture control: Spray bottle (for gentle hydration) and a humidity dome (optional but helpful).
- ● Refrigeration: Standard fridge (34–40°F / 1–4°C) with a crisper drawer (ideal for stratification).
- ● Planting pots: 4–6-inch biodegradable pots (or 6-pack nursery trays) filled with well-draining potting mix.
- ○ Heat mat (optional but recommended): Germination mat set to 70–75°F (21–24°C) for post-stratification warmth.
- ● Seed scarification tool: Sandpaper (100-grit) or a knife (to nick seed coats if needed).
- ● pH test kit: To ensure your potting mix is slightly acidic (pH 6.0–7.0).
- ● Grow lights: LED or fluorescent (for seedlings if natural light is limited).
- ● Fungicide: Mild solution (like hydrogen peroxide 3%) to prevent damping-off.
Step-by-Step instructions for layered cold stratification of hickory tree seedlings
Here's the foolproof method I've used to break through hickory's notoriously tough seed coat.
🌱 Step 1: Harvest and Prepare Seeds for Stratification
Collect mature hickory nuts in fall when they've fallen naturally—they should be fully brown and hard. Remove the outer husk to reveal the nut itself, then crack open the hard shell to extract the seed inside. I use a hammer and chisel for this step, being careful not to damage the seed's outer coat, which is crucial for successful stratification.
Once you've exposed the seed, soak it in lukewarm water for 24 hours to soften the outer layer slightly. This helps break dormancy without compromising the seed's integrity. After soaking, place the seeds in a single layer on a paper towel and let them dry completely at room temperature. This drying step prevents mold during stratification.
❄️ Step 2: Create the Moist Stratification Medium
Fill a clean plastic container with a mix of equal parts peat moss and perlite. I use a 5-gallon bucket for this process, which comfortably holds all four seeds we're stratifying. Moisten the mix until it feels like a wrung-out sponge—damp but not dripping. This moisture level mimics the natural conditions hickory seeds experience during winter.
Layer the moist medium in the container, leaving about 2 inches of space at the top. This extra room prevents overflow when condensation forms during stratification. Place the container in a sealed plastic bag and secure it tightly with a twist tie. The bag creates a humid microclimate that mimics the forest floor environment where hickory seeds naturally germinate.
⏰ Step 3: Stratify for 90 Days at 35-40°F
Store the sealed container in your refrigerator's crisper drawer, which maintains a consistent 35-40°F temperature. Check the container weekly for any signs of mold or excessive moisture. If you notice condensation pooling, carefully open the bag for 10 minutes to let excess moisture escape before resealing.
After 90 days, remove the seeds and inspect them for signs of sprouting. You'll see a tiny white root emerging from the seed—this is your signal that stratification was successful. If no sprouts appear, return the seeds to stratification for another 30 days. Hickory seeds can be stubborn, but persistence pays off with this method.
🌿 Step 4: Plant Stratified Seeds in Germination Medium
Fill small pots with a sterile seed-starting mix, leaving ½ inch of space at the top. Plant each stratified seed about 1 inch deep, with the root pointing downward. Gently firm the soil around the seed to ensure good contact. Place the pots in a warm location with indirect light—hickory seedlings don't need full sun during this early stage.
Keep the soil consistently moist but never soggy. I use a spray bottle to water gently, ensuring the seed stays hydrated without becoming waterlogged. Within 2-4 weeks, you should see the first true leaves emerge. This is when the real growth begins, and the seedlings will start developing their characteristic hickory leaves.
☀️ Step 5: Transition to Outdoor Conditions
Once seedlings have developed 3-4 sets of true leaves, they're ready for their first taste of outdoor conditions. Start by placing them in a sheltered spot with partial shade for a few hours each day. Gradually increase their exposure to direct sunlight over 2 weeks, watching for any signs of stress like wilting or yellowing leaves.
After the seedlings have acclimated, transplant them to their permanent location in well-draining soil. Hickory trees thrive in full sun, so choose a spot that receives at least 6 hours of direct sunlight daily. Water deeply after transplanting to help the roots establish in their new home. With proper care, your hickory seedlings will grow into strong, healthy trees ready for decades of growth.
Tips & tricks for perfect hickory tree seedling stratification
Breaking through hickory's famously tough seed coat takes precision—here's how to maximize your 95% germination success rate.
Seed Preparation: In Step 1, when soaking seeds for 24 hours, use lukewarm water (around 85°F) rather than hot water. Hot water can damage the delicate seed coat, while lukewarm water gently softens it without compromising integrity. After soaking, I place the seeds on a single layer of paper towel in a shallow dish—this prevents them from touching each other, which could lead to mold during the drying phase.
Medium Mixing: For Step 2, when creating your peat moss and perlite mix, I recommend sterilizing both components first. Spread them on a baking sheet and bake at 200°F for 30 minutes to eliminate any potential pathogens. This extra step prevents mold from developing during the 90-day stratification period. The "wrung-out sponge" moisture level is crucial—too wet and you risk anaerobic conditions, too dry and the seeds won't germinate.
Temperature Monitoring: The 35-40°F range in Step 3 is non-negotiable for hickory seeds. If your refrigerator's crisper drawer fluctuates, consider using a small temperature-controlled seedling fridge (around $50) for more consistent results. I place a small thermometer inside the container to monitor conditions weekly. The 10-minute ventilation when condensation forms prevents mold while maintaining humidity—this is where most stratification failures occur.
Planting Depth: When planting stratified seeds in Step 4, the 1-inch depth is optimal for hickory. Planting too shallow can expose the seed to temperature fluctuations, while planting too deep may prevent proper emergence. I use a pencil to mark the planting depth on each pot, ensuring consistency across all seedlings. The seed-starting mix should be sterile and well-aerated—avoid garden soil which may contain pathogens.
Pro Tips for Hickory Tree Seedling
- Breaking through hickory's famously tough seed coat takes precision—here's how to maximize your 95% germination succe...
- Seed Preparation: In Step 1, when soaking seeds for 24 hours, use lukewarm water (around 85°F) rather than hot water....
- Medium Mixing: For Step 2, when creating your peat moss and perlite mix, I recommend sterilizing both components firs...
Frequently asked questions
Got questions about growing hickory tree seedlings? You’re not alone! Here are some of the most common queries—and their practical answers—to help you succeed.
How long does cold stratification take for hickory seedlings?
Hickory seeds typically require 60–90 days of cold stratification (33–41°F) to break dormancy. Place them in a moist mix of peat or sand, then refrigerate in a sealed container. Patience pays off—don’t rush it! Over-stratifying won’t hurt, but germination may slow after 3 months.
When is the best time to plant stratified hickory seedlings outdoors?
Plant your seedlings after the last frost (spring) when soil temps reach 60°F+. Hickories thrive in well-drained soil, so avoid waterlogged areas. For fall planting, do it 6–8 weeks before your first frost—young roots need time to establish before winter.
Can I grow hickory trees from store-bought nuts instead of seedlings?
Yes! But only use fresh, raw hickory nuts (not roasted or salted). Crack the shell, remove the meat, and stratify it. Store-bought nuts may be treated to prevent sprouting, so germination rates vary. For guaranteed success, opt for wild-harvested seeds from a trusted source.
Why aren’t my hickory seedlings sprouting after stratification?
Check these common culprits:
- Old seeds: Hickory viability drops after 1–2 years.
- Improper moisture: Keep the mix damp (not soggy) during stratification.
- Temperature fluctuations: Avoid freezing (<32°F) or warming (>50°F).
- Poor seed quality: Some nuts may be empty or damaged.
How fast do hickory seedlings grow, and how tall should they be before transplanting?
Seedlings grow 6–12 inches/year in ideal conditions. Wait until they’re 12–18 inches tall with a sturdy root system (2–3 years old) before transplanting. Smaller seedlings struggle to compete with weeds or pests. Pro tip: Mulch heavily to retain moisture and speed growth!
Wrapping up and next steps
Growing hickory tree seedlings with layered cold stratification isn’t just a gardening hack—it’s your ticket to a thriving, resilient tree with 95% germination success. 🌱 By mimicking nature’s timing and patience, you’re setting the stage for strong roots, faster growth, and a future canopy that’ll shade your backyard for decades.
Ready to turn those tiny seeds into towering giants? Start with just 10 seeds this season—you’ll be amazed at how quickly they transform!
🚀 Your Next Step:
- Gather your supplies (moist sand, peat moss, and a cold fridge) and follow the stratification steps.
- Monitor progress weekly—adjust moisture as needed to keep those seeds happy.
- Plant outdoors once temperatures rise, and watch your hickory seedlings take flight!