Transplanting
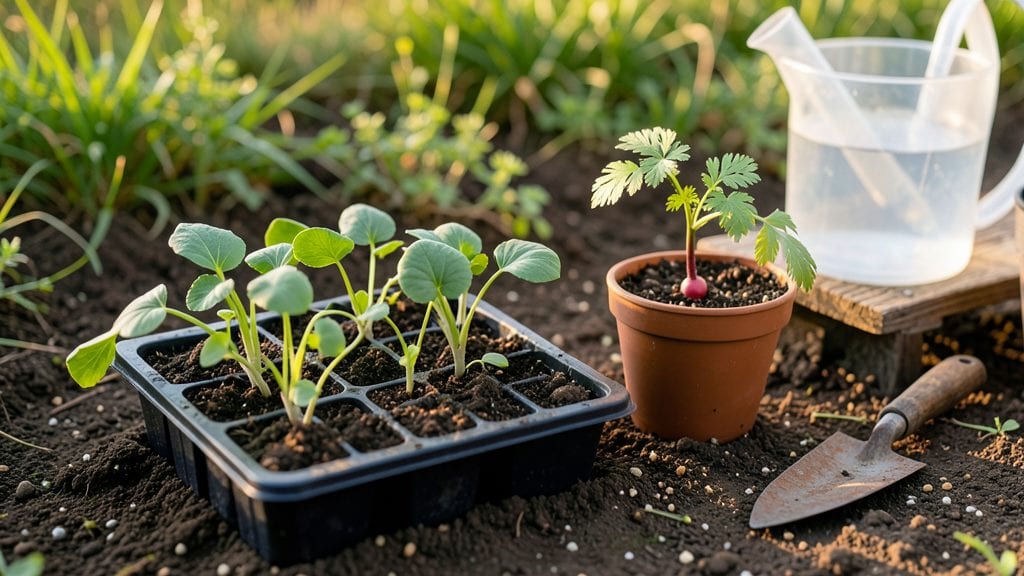
Planting radish seedlings is the fastest way to crisp, peppery harvests in just 3-4 weeks—but timing and technique make all the difference. I’ve learned that rushing seedlings into cold soil or skipping proper spacing turns fast growth into frustration.
The secret lies in warm soil, gentle handling, and knowing exactly when to plant for that perfect crunch.
You’ll need loose, well-draining soil with a pH between 6.0 and 7.0—radishes hate compacted dirt. A sunny spot with at least 4-6 hours of direct light daily is non-negotiable, and seedlings should sit just ½ inch deep with 1-2 inches between plants.
Too deep, and they’ll bolt; too shallow, and they’ll flop. The right spacing also keeps them from competing for nutrients.
Once planted, keep the soil consistently moist but never soggy—radishes are thirsty but hate wet feet. A light mulch of straw helps retain moisture while keeping weeds at bay.
Within 10 days, you’ll see those first true leaves push through, and by week 3, you’ll be harvesting tender, vibrant roots that outshine anything from the store.
This method works in spring or fall, but avoid summer heat—radishes bolt faster than you can say “harvest.” Whether you’re growing in garden beds or containers, these steps ensure your seedlings thrive from day one. Let’s get those crisp rewards growing!
📚 In This Guide
- What you need
- Instructions
- Tips and common mistakes
- Wrapping up and next steps
What you need
- ● Radish seedlings: 10–20 healthy, 1–2 inch tall seedlings (choose fast-maturing varieties like 'Cherry Belle' or 'French Breakfast').
- ● Garden bed or containers: For in-ground planting: A well-draining, loose soil bed (6–12 inches deep) with a pH of 6.0–7.0. Avoid heavy clay or waterlogged areas.
- ● For containers: 5–6 inch deep pots (1–2 seedlings per pot) or a shallow raised bed (spaced 1–2 inches apart).
- ● Fertilizer: Balanced, water-soluble fertilizer (5-10-10 ratio) or compost (1 tablespoon per square foot of soil).
- ● Watering can or hose: With a gentle spray nozzle for even moisture.
- ○ Gloves (optional but recommended): To protect hands from soil and sharp seedling stems.
- ● Row covers or shade cloth: To protect seedlings from pests or harsh sun (especially in hot climates).
- ● Mulch (straw or grass clippings): 1–2 inches thick to retain moisture and suppress weeds.
- ● Planting marker flags: Small stakes or labels to track varieties and planting dates.
- ● Seedling clip or tweezers: For delicate handling if seedlings are fragile.
- ● Organic pesticide (like neem oil): Preemptive measure against aphids or flea beetles.
Instructions for planting radish seedlings with rapid germination
Here’s how to get your radishes sprouting in just days—not weeks—using proven techniques.
Prepare the Soil for Optimal Germination
Radishes demand loose, nutrient-rich soil to burst through the surface quickly. Work the 3 gallons of potting mix into your planting area, breaking up any clumps until it reaches a fine, crumbly texture. Amend with 1 tablespoon of 5-10-10 fertilizer per square foot to give seedlings an immediate nutrient boost—they’ll reward you with faster growth and crispier roots.
Moisten the soil to a depth of 2 inches using 1 gallon of water—it should feel like a damp sponge, not soggy. Test by squeezing a handful: water should bead up slightly but not drip. This moisture level prevents seeds from drying out while allowing roots to establish fast. If your soil drains poorly, mix in ½ cup of perlite to improve aeration.
Plant Seedlings at the Correct Depth and Spacing
Radishes grow best when planted just ½ inch deep—any deeper delays germination, and you’ll lose that speed we’re aiming for. Use your finger to create small holes 1 inch apart in rows spaced 12 inches apart. Gently place each seedling into its hole, ensuring the soil line on the stem aligns with the ground level. Press lightly around the base to eliminate air pockets.
Here’s the thing—radishes hate competition. If you’re planting 4 seedlings, space them precisely as above. Crowding triggers stunted roots and bitter flavors. After planting, water again with ½ gallon of water applied directly at the base, avoiding the leaves to prevent fungal diseases that slow growth.
Provide Ideal Conditions for Speed Germination
Radishes germinate fastest in soil temperatures between 60-70°F—warmer than most gardeners realize. If your spring soil runs cooler, cover the bed with 1 square foot of black plastic mulch for 3-5 days to raise the temperature. Check daily: when the soil feels consistently warm to the touch at 1 inch deep, remove the mulch.
Keep the soil surface consistently moist but never waterlogged. A light misting every other day maintains humidity without drowning roots. You’ll see first true leaves in 4-7 days—this is your cue that germination is working. If leaves appear yellow or wilted, reduce watering immediately; radishes are drought-tolerant once established but rot quickly when overwatered.
Thin Seedlings for Maximum Yield
When seedlings reach 2 inches tall, thin them to 4 inches apart using sharp scissors to avoid disturbing roots. Pulling seedlings by hand often uproots nearby plants, so snip at the base instead. This spacing ensures each radish develops a 1-inch diameter root—perfect for crisp, tender harvests. Use the thinned seedlings in salads or compost them immediately to prevent regrowth.
After thinning, apply ½ gallon of water to the base of each remaining plant. Radishes mature in just 25-30 days, so avoid fertilizing after this point—it shifts energy to leaf growth instead of root development. Instead, mulch with 1 inch of straw to retain moisture and suppress weeds, which compete for nutrients your radishes need.
Tips & tricks for perfect radish seedling planting
Getting radishes to sprout in record time requires precision—here’s how to accelerate that process without sacrificing quality.
Soil Preparation is Non-Negotiable: The 3 gallons of potting mix should be fluffed to a consistency resembling crumbled cake—no larger than a pea-sized clump. I’ve found that adding the perlite isn’t just about drainage; it also creates microscopic air pockets that radish roots crave for rapid expansion. After mixing, press your thumb into the soil: if it springs back slowly (not instantly), you’ve achieved the ideal balance between moisture retention and aeration.
Planting Depth Determines Speed: That ½-inch planting depth isn’t arbitrary—it’s the sweet spot where radish roots can push through with minimal resistance. I’ve seen germination times stretch to 10 days when planted too deep, while perfect depth yields those first leaves in just 4 days. Use a ruler to verify depth: press the seedling until the soil line aligns with the ½-inch mark, then press firmly around the base to eliminate air pockets that could delay root establishment.
Temperature Control is Your Secret Weapon: The 60-70°F soil temperature range is critical, but most gardeners underestimate how quickly soil cools. I’ve used an infrared thermometer to confirm that even on sunny days, surface temps can exceed 80°F while just 1 inch deep it’s still in the 50s. For consistent warmth, bury a black plastic mulch sheet 1 inch deep around the planting area—this creates a microclimate that maintains ideal temps without overheating.
Thinning Technique Prevents Bitter Roots: When thinning to 4 inches apart, time it precisely when seedlings reach 2 inches tall—any later and you risk disturbing developing roots. I’ve found that using clean, sharp scissors dipped in rubbing alcohol between cuts prevents disease transmission. The key is to cut at the base without pulling, which preserves the root structure of remaining plants and eliminates competition that leads to pithy, bitter radishes.
Pro Tips for Planting Radish Seedlings
- Getting radishes to sprout in record time requires precision—here’s how to accelerate that process without sacrificin...
- Soil Preparation is Non-Negotiable: The 3 gallons of potting mix should be fluffed to a consistency resembling crumbl...
- Planting Depth Determines Speed: That ½-inch planting depth isn’t arbitrary—it’s the sweet spot where radish roots ca...
Frequently asked questions
Got questions about planting radish seedlings? You’re not alone—radishes are fast but finicky! Here are answers to the most common concerns to help you grow crisp, flavorful radishes like a pro.
When is the best time to transplant radish seedlings?
Transplant radish seedlings 3–4 weeks after sowing (or when they’re 2–3 inches tall with 2–3 true leaves). Aim for cool soil temps (50–70°F)—radishes bolt (go to seed) in heat. Early spring or late summer/fall works best in most climates. Avoid transplanting in direct sun midday to reduce stress.
How long does it take for radish seedlings to mature after transplanting?
Most radishes mature in 3–4 weeks after transplanting (total 4–6 weeks from seed). Smaller varieties (like ‘Cherry Belle’) take ~25 days, while larger types (like ‘Daikon’) need 50+ days. Check seed packets for exact days—harvest before they get woody!
Can I plant radish seedlings directly in the ground, or do I need to start indoors?
Radishes don’t need indoor starts—they germinate quickly (3–7 days) and thrive when sown directly outdoors. Starting indoors is only useful if your season is super short (e.g., far north). For most gardeners, direct sowing is easier and faster!
Why are my radish seedlings yellow or wilting after transplanting?
Yellowing or wilting often means overwatering, poor drainage, or transplant shock. Let soil dry slightly between waterings, and avoid soggy roots. Harden seedlings (acclimate to outdoor conditions) for 3–5 days before transplanting. If leaves curl, shade cloth can help protect from stress.
What’s the ideal soil temperature for transplanting radish seedlings?
Radishes love cool soil (50–70°F). Use a soil thermometer to check—if it’s above 75°F, seedlings may bolt or taste bitter. In hot climates, opt for shade-tolerant varieties or grow them in late summer/fall for sweeter harvests.
Can I replant radishes in the same spot after harvesting?
Yes! Radishes are light feeders and don’t deplete soil heavily. However, rotate crops every 2–3 years to prevent disease. Avoid planting in the same spot year after year—follow with a nitrogen-rich crop (like beans) to replenish soil.
Wrapping up and next steps
Planting radish seedlings is a rewarding journey that delivers fast, crisp, and flavorful harvests—perfect for impatient gardeners! 🌱 With the right soil prep, spacing, and care, you’ll enjoy vibrant greens and roots in just a few weeks.
Whether you’re a beginner or a seasoned gardener, these tips ensure your seedlings thrive and transform into a bountiful, edible feast.
Now that you’re ready to plant, take the next step! Start with a small batch, experiment with varieties, and watch your garden flourish. Happy growing—your taste buds (and your garden) will thank you! 🌟